Showing posts with label free pattern. Show all posts

Saturday, February 7, 2015

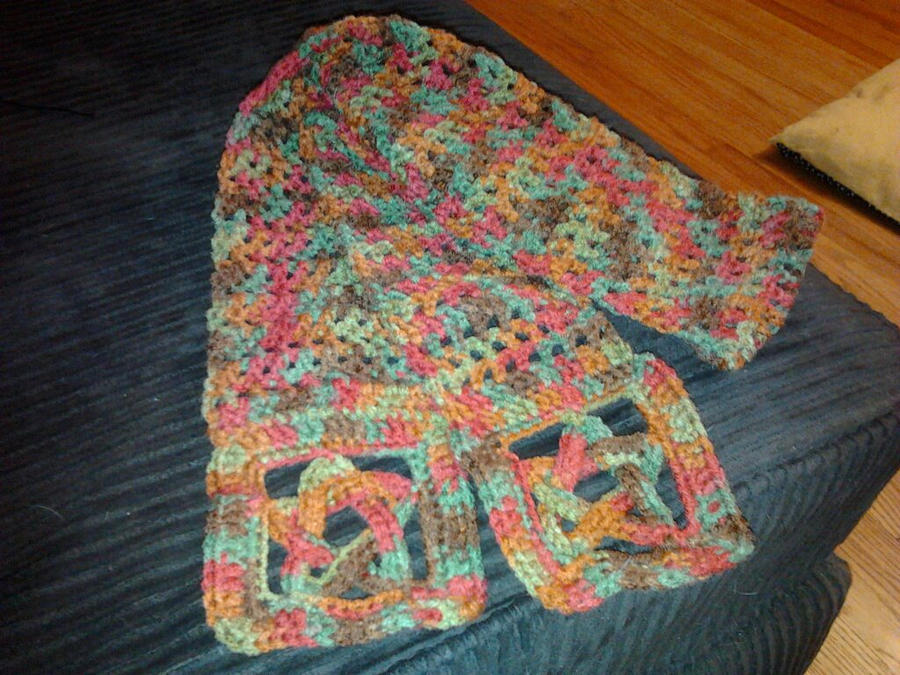
Hearts Inside Shawl [Pattern] *Updated*


This is a bottom up shawl, which makes it easy to size up or down.  This is not an original idea, I am making it from a swatch I found and deconstructed.

The one in the photo is sized for a child, at wides its 8 hearts.  Spanning 3 1/2 feet wide.

With WW yarn (just under a skein) and a size I crochet hook.

Cluster - 4 DC worked into the same space/stitch
Beg Cluster -Chain 4 ( counts as first DC and chain 1), dc 4 into first ch space, sc into middle of cluster below ----All rows after row 2 will start this way.
End Cluster- sc in middle of last cluster, (cluster, ch 1, dc) in last ch sp    ---- All rows after row 2 will end this way.

r1- Chain 6, in 5th and 6th chains from hook work DC Inc, chain 1, DC into the 6th chain.
r2- Beg Cluster, sc between the increases in previous row (not into the top of the stitch but between stitchs), End Cluster
r3- Beg Cluster, sc into middle of previous cluster (between stitchs), chain 3, End Cluster
R4-Beg Cluster, sc into middle of cluster below, chain 3, sc around the next chain space, ch 3, End Cluster
r5- Beg Cluster, sc into mid of cluster below, chain 3 sc around next ch sp, work cluster into next sc, sc in next ch sp, ch 3, End Cluster
r6-Beg Cluster,  ch 3, sc around next ch sp, cluster in next sc, sc in middle of cluster below, cluster in next sc, sc around next ch sp,  ch 3, end cluster

---- by now you should have one full heart completed--  I will write the directions for up to 3, but its an easy 4 row repeat (rows 3-6)

r7- Beg Cluster, Ch 3, sc around ch sp, ch 3, sc  in mid cluster, ch 3 sc in mid of cluster, ch 3, sc around ch sp, ch 3, end cluster

--This is your foundation row, you should have 5 chain spaces ---

R8- Beg Cluster, ch 3, sc around ch sp, cluster in next sc, sc around ch sp, ch 3, sc around next ch sp, ch 3, sc around next ch sp, cluster in next sc, sc around next ch sp, ch 3, end cluster

---This row forms the bottom of all the hearts so you should have 4 ch sp and 2 clusters----

R9- Beg Cluster, ch 3, sc around ch sp, cluster in next sc, sc in mid of cluster, cluster in next sc, ch 3, sc in next ch sp, ch 3, sc in next ch sp, cluster in next sc, sc in mid of cluster, cluster in next sc, ch 3, sc in next ch sp, ch 3, end cluster

--This should have complete the top of all the hearts (2)---

r10- Beg cluster,  ch 3, sc in ch sp, ch 3, sc in mid cluster, ch 3, sc mid cluster,  ch 3, sc in ch sp, ch 3, sc in mid cluster, ch 3, sc mid cluster, ch 3, sc in ch sp, ch 3, end cluster

--You should see the pattern forming now--

r11- Beg Cluster, ch 3, sc around ch sp, cluster in next sc, sc around ch sp, ch 3, sc around ch sp, cluster in next sc, sc around ch sp, ch 3, sc around ch sp, cluster in next sc, sc around ch sp, ch 3, end cluster.

r12- Beg cluster, ch 3, sc around ch sp, cluster in next sc, sc in mid of cluster, cluster in next sc, ch 3, sc in next ch sp, ch 3, sc in next ch sp, cluster in next sc, sc in mid of cluster, cluster in next sc, ch 3, sc in next ch sp, ch 3, sc in next ch sp, cluster in next sc, sc in mid of cluster, cluster in next sc, ch 3, sc in next ch sp, ch 3, end cluster


For bigger shawls just keep repeating the pattern in rows 9-12.

*Updated 2/12/2016*

Added a diagram, as there was some confusion in the written pattern I hope this can help clear it up.  I color coded each row all even rows are blue and odds are black.


Saturday, January 24, 2015

CD-WIP update


He is not finished yet.  I spent about 4 hours brushing out his hair with a slicker brush, then trimmed it up a bit.                
                 
I will probly brush it some more and give it an other trim later but for now I will leave the hair as it is.

I still need to work out a pattern for ears, and decide if I want to add in a eye lid or any other details.

Sadly I didn't realize how heavy his front end would be so I can not put him in the pose I had planned.  Which would be a springing spiral pose as if he was getting ready to launch himself into the sky his top end is just to heavy and the wire is not enough support.  So I know now if I make an other CD I need to either double up on the wire, possibly twisting it cable style for better support or get a thicker stronger wire that might be harder to manipulate.

At some later point I am going to play with posing him and see if I can come up with something I like better then this pose.


Tuesday, January 20, 2015

Feeling a bit sheepy

 I wanted a quick project to whip up while working on the dragon.  So I started up this small sheep!

He is sporting some hand painted silver green eyes.  I still need to work up some small little legs but that will need to wait for day light hours when I can see my stitches in the black tweed I will be working them out of.  I am using the same bulky yarn I used when I made a llama last week.  I some how never got a photo of it to share before it was sold.             

This is a bulky baby blanket yarn, it screamed llama at me in the store.  So I bought it, but now I have a huge ball of it still left so I need to get cracking and make a few more llama's and if the sheep goes over well some more sheep.

I am not sure what else I can use the yarn to make.  SC stitchs look like fluffy tuffs of wool which IMO makes for a perfict llama and sheep body. Do you have any sugestions?


I am jotting down notes as I work so long as I dont lose them I will try to get a pattern for this guy out.

Wednesday, December 3, 2014

Mittens with flaps..? *Pattern*

 Mittens-Fingerless gloves

I am making these for my moms SO John as yet an other christmas gift.

He has fairly large hands so these are sized for a mans large.  My finger just barely pop out of them where the flap folds back.

It can easily be adjusted by swapping for a smaller hook, or by doing the cuff section to fit your wrist, and adjusting the hand section as you go.

Its worked in mostly one piece you will have to make the start of the flap before you start the mit that way when you get to the hand section of R17 you have it ready and do not have to cut the yarn work it and then work back in.  If you want more over lap in the mitten just add an additional row to this piece in sc.  Both hands are worked the same, only row 17 is slightly different on where you place the flap to open the mit.


I am using RedHeart in Camouflage. A size I/9-5.50mm hook, if you want smaller you can easily drop down to a H/G/F hook with out needing to adjust the pattern.

When working in the round I always end with a slip stitch and chain to start the next row, no turning.

Mitten Flap-
Chain 18, in 2nd ch from hook hdc across (16)  Make 2 and set aside till hand row 17

Cuff-

R1-Chain 15 (for smaller cuffs chain less, this just ensures the mits will tuck inside his jack sleeves so his wrists are not cold), sc 14 across.
R2-30- BLO sc all chain turn

Slip stitch the edge of R1 to R30 to form a tube then flip it right side out (so your slst dont show).

Hand-
R1- Chain one (you should be above the join so working into the side of your rows), sc across (30) Thats one sc in the side of each row.
R2- Inc, sc 6 (you will end with a sc of 7) (34)
R3-7- sc all (34)
R8- sc 15, in the next 4 stitchs increase, sc 15 (38)
R9- sc all
R10- Sc 13, chain 3, sk 12 st, sc 13 (29) You just separated out the thumb section for the mit we will come back to it later
R11-16- sc all
R17 RIGHT Hand- Sc 16, now take one of the mitten flap sections and we will be sc across the top of it for 16 more sc  ending with a slst into the start of the round (32) (this will create your flap so you have a slight over lap on the palm, you will work across that flap section from here on.)
R17 LEFT Hand- Sc 1, then take the mitten flap section and work 16 sc across, skipping over  13 stitches on the glove, sc 16 (this should finish your row)
R18-22- sc all (32)
R23- Sc 4, dec around
R24- sc all
R25- Sc 3, dec
R26-30- sc all
R31- dec, sc 2
R32- slst opening closed by flatting the top and working across.

Thumb
R1- Attach yarn to the middle of the chain 3 section chain 1 and work 1 sc into the middle stitch you just attached to, decrease, 10 sc, dec, slst to join chain
R2-7- sc all
R8- dec all
R9- flaten the tip and slst across to close it.

From here we need to weave in tailes, and using a foot long lenth, we need to throw a few stitchs into the mitten flap edges to secure them to the mit along the edge to the sc row 16.


Monday, November 10, 2014

Chibi Kyubey Pattern

Chibi Kyubey FREE Pattern

Use the link above and you can have your very own Kyubey instructions to make your own little soul sucking adorable alien cat thing.

This was a requested pattern by u/saleina from over on Reddit.

I sort of rushed the embroidery on this guy so I could finish up the pattern with a completed photo.  At some point I will try redoing the mouth.  But for now I need to get back to working my fingers off on getting as many ami's finished to shoot off to RESOBOX Gallery as possible!

If anything is unclear, or doesnt make sence let me know and I can help you work it out!


Saturday, August 16, 2014

Baby Groot


This is a birthday gift I just started working on for my husbands birthday next week.  Its actually one of the two items I am making him.

I was going to use TwinkyChan's pattern but as I was working it, it just looked so wrong and disporptionet which is a shame as she makes some great patterns.  There is no way the photo's she has listed with the pattern where made using that pattern.

I am going to try and remember what I am doing as I work this up so I can share. BUT its 2:30 AM right now I was sort of hooking on auto pilot. 

So far I have finished and shaped the head.  I have 2 branches I need to sew into the top. I am debating on if I want a third branch or not.

I am referencing a few different photos for my pattern.  I just googled 'baby groot' the ones I am looking at mostly are this clay sculpture you see in the photo and a movie still.

What I have done so far so I don't for get to post it in the morning

with F hook ww yarn
Head
1-- mr 6
2 --inc all (12)
3 --inc sc all (18)
4 --inc sc 2 all (24)
5-9 --sc all
10- 'sc 2, dec' 3 times, sc remaining (auto pilot lost count)
11- 'Sc, dec' 3 times, sc remaining
12-13 sc all


I will post more tommrow to explain the 'crown' and how to close the top of the head so tired right now.
Head continued - I worked the crown in the FLO, I made my bark sections by doing sc/hdc/dc with slip stitchs down the side of the dc, when I do the dc in this mannor I link them to the stitch next to them by doing my YO diffrently, instead of doing a YO i slip the hook into the side of the st i just finished (on hdc/dc its in the YO section, on a sc its just the side) and pull up a loop that is the YO then I work the st as normal.  I alternated between doing sections of  ch 2 dc/hdc/sc and reversing it with some lower points that are sc hdc sc between the highest  points.
   
Now if I had not been half alseep, I would have FO with a slst then joined the yarn back onto the BLO of row 13 and worked the closing of the head as fallows

14-blo- sc, dec around
15- dec all
Leaving a 2 foot long tail to weave threw the opening, add in eyes and stuffing then cinch closed and use  your long tail to shape the face.   I slipped my needle threw and out under the eye made a stitch then weaved to the bottom and back up to the other eye.  I alternated between stitchs between the eyes and going to the top of the head or the bottom to secure and shape.


(What my sleep addled brain did, was work the top seperatly and sew it on (( mr 6/inc all/sc inc))


Body
1 mr 6
2 inc 12
3 inc sc 18
4 sc all for 3 rows 18
5 sc2  dec all this row will end in a sc 2 14
6 sc all
7sc all
8 dec, sc 2 (10)
stuff stuff stuff stuff stuff-- if you are planning on having him in a bought pot you might want to add weight to his bottom half in the form of poly pellets or even a metal nut if you never plan on getting him wet.
9-20 Sc all
FO leaving tail for sewing open end to head.


If you have pipe cleaners feel free to use one, I wanted the arms to be poseable.  I folded mine in half and used the hook to pull it threw the 3rd row from the top.  -Side note- a green or brown pipe cleaner might be best, as if it peeks out of the arm in any spot it will just add a bit of character to your Groot.  If anyone asks my Groot may have blue tree mold as the pipe cleaner I picked is blue and quite fuzzy. 


Sorry for the delay in finishing this-- got a lot happing here in St Louis and wasnt able to work on this most of the weekend

Here is the arm make 2

When you start your MR leave a long tail, as this will be the tail used to sew it to the body
MR 4 -do not tighten it close, get it closed enough you can work in the next row if you need to after a few rows slip your hook out and slid it inside the arm to loosen that ring back up this way you can work it over the pipe cleaner.
Work in a continuous spiral, till you get to the end of your pipe cleaner (the length you want your arm to  be) for me that was just about 7 1/2 to 8 rows.  When my arm was 2/3 of the length of the pipe cleaner I slit it onto it and worked the remaining rows while it was ON the pipe cleaner/arm.   DO NOT CUT WORKING YARN YET.
Helpful tip if you get a hook a size or two smaller slip the hook under the bent end of the pipe cleaner and slid the arm over the hook and onto the pipe clean it goes on easier... I did it the hard way the first time -.- and bend my pipe cleaner up in the process and had to fix it before proceeding on.

Hand (worked as part of the arm not in a spiral) --after thought now that I have worked the hands, they may look better if you drop down a hook size to work them.

Once your arm is long enough to cover the PC, skip the next stitch and work a slip stitch, ch 4 in the 2nd st from hook slst back down chain and into the next st in the arm. Ch 6 in 2nd st from hook slst all the way back down, slst into the next st on the arm.  Ch 4 in the 2nd st from hook slst back down chain, now slst into the stitch you skipped over at the very beginning this will create the shaping of the hand creating a palm.  I left a bit of a long tail on mine (because I forgot to leave a long tail on my magic ring) and I am going to weave it down the arm and use it to help secure the arm to the body. You may want to twist the arm a bit on the pipe cleaner to position it in the way you want before sewing it to the body.  

If for some reason your palm area is open showing the pipe cleaner (due to loose tension or some other reason) just use your tail to weave it shut before sewing/hiding the tail.


Now on to adding embellishments.

I am going to add a few branchs to his head. I am working the branches with my E hook and all other embellishments.


Branch 1- chain 6, in 2nd st from hook sl st, slst 2 more, (2 chains left) chain 4 in the 2nd st from hook slst, slst in all remaining chains (5).

Branch 2- Chain 5, slst 1, chain 3 slst all remaining chain st's

Branch 3- Chain 4, slst 1, ch 2, slst  all remaing st's

Leaf 1- chain 4, 2nd st from hook slst, sc, slst FO leaving tail to sew into body

Leaf 2- ch 5, 2nd st from hook slst, sc, hdc, slst

Leaf 3- Ch 3, 2nd ch from hook slst all

For the vines, I took some of the scrap yarn from the tails of the leaves and from an other project with a litter brown and unply'd them, I held the single along with my working yarn and chained 35 for one vine and 40 for the other vine.

I wrapped them around, I actully played around with the wrapping till I felt it looked good.  I started off with the longer chain wraping it around the base for stablity, then joined in the shorter chain and wraped them going up and twisting them over each other in one spot and I chose to split the two vines one the wrap about around to the front taking one up and over the arm and the other around and under to wrap up over the other arm around his neck.

I still need to attach vines but the pattern itself is done!!  I just need to finish this guy off.

Saturday, June 14, 2014

Sealife Pattern now in PDF Download!

I have had a bit of down time durning the convention this year and I am using it to work on getting PDF version of the more popular patterns I have  up on my site.

By far my Sealife Critters gets the most views per day so I though I would get it up first.
Sealife Critters <~~~~<< download the PDF and let me know what you think!


Monday, March 24, 2014

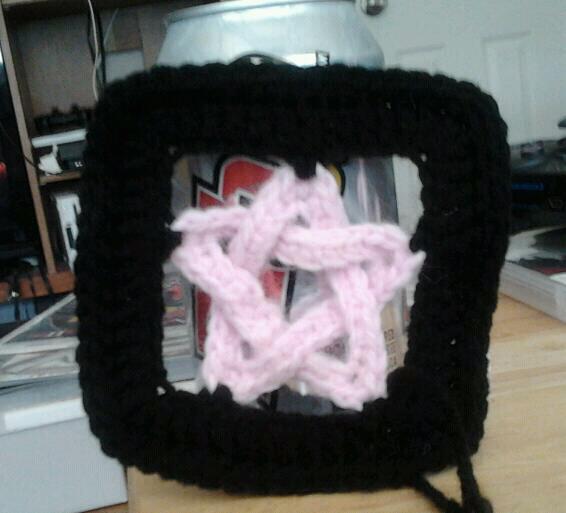
Star 'Pentical' Granny Square Pattern

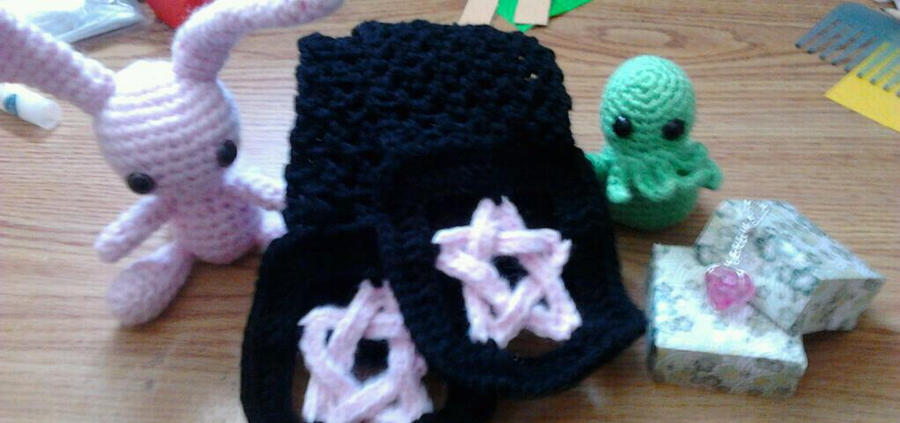
PGS scarf commission
Ok so over a year ago I saw someone posting a 'pentacle' granny and I looked at it and it was just a 6 pointed star/flower granny which disappointed me so I made up my own pattern to make a true pentacle granny square.

I have all my notes that I scribbled down, and have been promising since like July 2012 that I would write the pattern up.

So here it is, the long awaited Pentacle GS

US terms blah blah blah
I dont have any wip shots because when I wrote the pattern I did not take any, and when I was requested to make a scarf with them I just plain forgot.  If it is to confusing to fallow with out pic's just let me know in the comments and I will make some time to whip one up with photos.

Any yarn and hook size can be used.  Just make sure you use the size hook the yarn label calls for (or go up or down a hook size).

I am also coining a few new term 2ndchfh = 2nd chain from hook, and cinc= Corner increase which is 3 stitches worked into one instead of 2.

Base of the star-
Chain 51, sc in 2ndchfh. sc 3, cinc (this should be the 5th ch st your working into),*sc 9, cinc,*  repeat *--* four more times (you should now have 5 points), sc 5 and fo leaving a tail for weaving in the ends.

The star needs to be 'weaved' together now,each CINC is now a point of the star.   See diagram the first  CINC is 1 and so on.

It may help to have a blocking board and pins to help you keep everything in its place.

First lay it out, you wont need to weave till after you get the 3 point positioned/pinned, you will weave under the line going from 1 to 2.  Place or pin your 4 point, then go over the line  from 1 to 2, and under 2 to 3.  Place/Pin point 5, go over 2 to 3, and under 3 to 4. now use your tail ends to sew the the two ends together, I like to do the invisible join where you use the darning needle and  weave it uner the two loops of the first sc then go back into the last sc between loops.  It makes it harder to notice the join.

Now to make the Square-
R1 SLST and sc into the 5 point (you want to be in the 2nd sc in the middle of the CINC), chain 9, sc into 3 point, ch 9, sc into 1 point, ch 9, sc into 4 point, ch 9, sc in 2 point, ch 7 slst into first sc.  Points 2 and 5 will be the bottom which is why they have fewer ch between them.
R2 Ch 1, sc 1, *CINC, sc 11,* repeat this *---* all the way around ending with sc  9
R3 Ch 2 (doesnt count as a DC) dc 2, *cinc, (the cinc should be worked in the middle st of the last cinc incase your stitch countgot off) dc 12, *  repeat *---* 4 more times and end with dc 10 slst to first st.
R4- Ch 1, sc 3, work a *cinc in the middle of last rows cinc, sc 14,* repeat *--* all the way around sc 12 at the end and FO

Thursday, November 7, 2013

Winter head wrap or Neck warmer.

 I decided to make a project for me since I have been working on stuff for others for some time.
I was out at a festavil with my sister and bro-in-law and the squirt and I keep seeing these chunky head bands.  They where all imported from china made from flimsy yarn and probably would fall apart in its first washing but I still wanted one.  At last I spend my money on other things like hydration and did not buy one but I figured I could just make one.So here it is my first go at this pattern I wrote as I worked.  It is super simple if you can double crochet, increase, and decrease you can do this.
You just need to know a few things
  • How big the persons head is that wants the item
  • Your crochet guage - which means how many stitches and rows it takes to make an inch (or your perfured method of measurement)

Start off by chaining 4
DC in the 2nd chain from hook, Dc in next chain (also last chain)
Ch 2 DC INC in both st's
Ch 2 Dc, inc, inc, dc
ch 2 DC 3, inc, inc, dc3

What I am doing here is Increasing in the middle two stitches you can increase till the band is wide enough for your liking, for a child I would stop increasing right here.  For my head band (fits my head at 22 inches) I did 2 more rows of increase.  

Once you have your increase as wide as you want the band to be measure it from the start point to the mid section of your last completed row.  Take that number and times it by 2 so if you have 4 inches, you would times it by 2 to be 8inches.  This number is important for me that would mean I would need to crochet an other 14 inches of just even back and forth rows.

Now depeding on your yarn, hook, and guage these numbers WILL differ for most people, I used a I or J hook with a #5 Bulky yarn but I crochet it tightly as I tend to do so my guage was about 3 stitches and 1 1/4 rows to an inch.

So what you need to do is just DC back and forth stoping to measure every know and then till you get the lenth you need  (( Head size {22} - Increase section{4*2})) Once you hit that lenght you will start your decrease rows which will be the same lenght as your increase rows (its why you muliplied by 2) As with the increases, I did all the decreasing in the middle section.

Picking up from where I left off in the patter--
Ch 2 dc 3, dec, dec, dc 3
ch 2 dc,dec, dec, dc
Ch 2 Dec, Dec
Ch 2 dc 2
Leave a long tail.  

Using the long tail sew in a button that is roughly 1 inch wide, it should slip snuggly between the DC's from the starting row to secure the head band, and if your band is a little loose just go up a row or two.

I plan on make a flower for my head band from my previous post, like the ones I made for my sisters birthday gift.  I will use an alligator clip to attach it so that I can have multiple flowers to dress it up or down depending on my mood.

I wore it out today because it is getting cold here and the wind was picking up, it was nice and warm, and when I got to the store I just pulled it down so it sat around my neck keeping the warmth from my jack in.  It is not only cute but it function as a multipurpose warmer.  My jacked is a tight jean jacked and doesnt have the space for a bulky scarf to be tucked into but this winter head band/neck warmer worked great for me and did what I needed it to do.

As always if you make one I would love to see it.

As always I used the American terms for stitches.


Tuesday, September 17, 2013

Amigurumi donut


Ok here it is! Took me the longest time to edit the video so you didnt have Torchwood blaring in the backround.  The video is about 14 minutes long.  Here is the writen pattern.

Light brown yarn, White yarn, G-4,25mm hook

In light Brown chain 12, making sure not to twist the chain slst into the first chain.
Inc, sc around
Inc, sc2 around
Inc, sc3 around
Sc all for 3 rows
Dec, sc3
Dec, sc 2
Dec, sc 1

 Here is where it might get a bit tricky, you should end up with 12 stitches at the end.  What I did was flatten it so the hole's lined up on the inside, and stitched about 1/2 of it together then started stuffing but it was kind of hard so I recommend you try and stuff ever 3 stitch you sew up.

Once that is done with white yarn (or any color you want the frosting to be)

Chain 14, slst making sure not to twist the chain.
Inc, sc around
Inc, sc2 around
Inc, sc3 around

Then in this last round if you want it to look perfictly iced just do it in sc, BUT if you want it to look like mine where the frosting looks like it is dribbling down the sides in spots then do it more like this
Sc 4, hdc, dc (into same st as hdc), dc, hdc, sc3, hdc dc trb (all in same stitch),dc, hdc, sc reapeat
You can do more triple crochets for larger 'drips' get creative with it.   Leave a long tail to stitch it onto the base, I recommend sewing it on one st in from the edge so it leaves it with that thick frosted look.  If you have long beads you could even sew a few of those on for sprinkles.